Padlet
- Samantha Sayer
- Sep 13, 2017
- 4 min read
A bulletin board for the computer! Padlet allows students to post their opinions/answers to questions or topics online and their classmates can see what they wrote instantly! Don’t worry teachers- if there is anything posted inappropriately, you can delete the post immediately and reprimand the student or take any actions necessary based on your school’s discipline plan. Also, you can change the privacy settings to require posts to be approved by the owner of the Padlet before it posts directly. Padlet can be used by using a computer or through the app that is available for any smart device. You can embed Padlets into websites and share them directly with people through emails.
Negatives: People can’t comment on posts. I think that allowing students to comment on classmate’s posts could open a dialogue between students. If there were an option like this for Padlet, it should also be noted that the teacher must approve comments before they are posted to ensure constructive feedback is given.
Lesson Ideas: Have the students respond to a simple question on a daily basis (during morning work) to get used to the app at first. Start incorporating the app into lessons where you teach a lesson and then have the students respond on a rotational basis to the Padlet. You can post a project, question, or discussion topic on the Padlet and have the students respond to it accordingly. An easy way to integrate this into your everyday teaching is to have a new post every week based on what you are teaching. Science and Social Studies are great time for this. Include pictures or videos to make it more fun and interactive.
Below I have added screenshots of important parts of the Padlet online app.

This is the main screen called the "Dashboard" when you first create an account. This will not have anything on it unless there has been activity from other people on your Padlets.

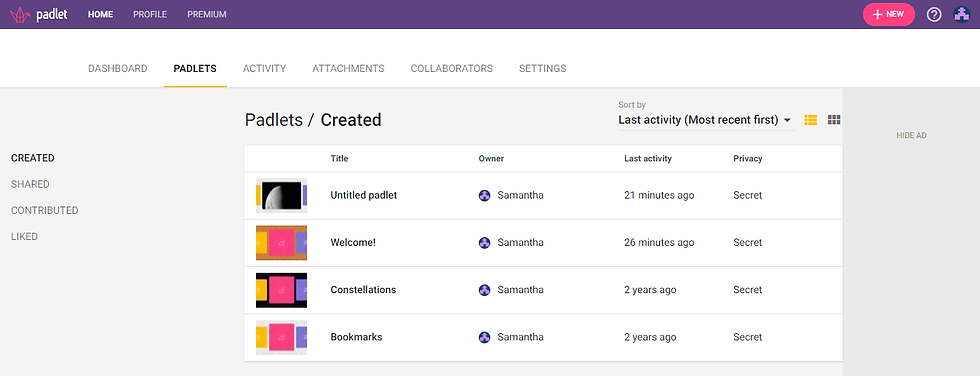
This screen shows all of your Padlets that you have created, when there was activity last, and the privacy setting that you have set. There are also options to the left that will show you the Padlets that you have shared, contributed to, and liked.
In the gallery below, I have included some examples of some of my past Padlets that I have used in the classroom. These examples include and simple welcome back padlet, a project padlet, and a discussion padlet that includes a picture in the directions.
The following series of pictures take you through how to create a brand new Padlet. From your dashboard click New Padlet.

This is the screen that will come up when you click New Padlet. This is where you will select a specific kind of Padlet. There are 5 options and the descriptions tell you how posts will appear in your Padlet. Choose the one that best suits your needs.

Padlet will create a simple sample padelt in order for you to change the options to best suit your needs. On the right hand side, you can change the Title and Description of your new padlet.

The next things that you need to change on your padlet would be the Wallpaper and Icon. If you do not see a wallpaper or icon that you would like to use, MORE is listed on the bottom right side of the section. If you click this, hundreds of options come up and you have the option to upload your own photos to become your wallpaper or icon. When you have this complete, click the Next button in the top right corner.

Once you click Next, you will have the option to change the privacy settings. Since I work with children's work, I keep the Privacy to Secret and embed the padlet in my website so students can access it. I also do not share it with anyone. This can all be adjusted based on your needs in the classroom.

Once the settings have been set for your padlet, you can create your first post! Simply click anywhere on the screen and this box will appear. Here you give your post a title and write what you want to say. There are also options where you can add an attachment- a voice memo, video, photo, or document can be uploaded through the icons at the bottom of the box.

When you add a photo or other attachment, it is as simple as attaching a document to an email. Simply find the document that you want to add and open it. The program will upload the document. If it looks like you want it on the right side, hit the OK button and it will put it in your post.

This is what a completed padlet and post look like!
Now if you already have padlets created, there are many options that you can adjust even if it has been shared. Below is a gallery of all the options that you could change once you have created your initial Padlet.


Comments