
Movenote
- Sep 19, 2017
- 2 min read

Have you ever wanted to try out the switched classroom but never knew how to start it? Movenote makes this process just a little easier! Movenote is an app where you can create presentations WITH a video of you explaining each slide. It turns lectures into videos quickly and easily so students can learn from anywhere.
Negatives: Recently, Movenote has moved from a free platform to a paid only platform. You can create a Movenote by continuing as a guest. However, your presentation will only be available for 2 days, according to the website. Unfortunately, I was unable to find my presentation again when I created a sample one. When I first used this program, it was free and there were many options and steps to create a presentation. If you decide to pay for this app, then it could transform the way you teach.
Lesson Ideas: Movenote is a great resource to switch the classroom. Have students listen to your presentations at home through the online portal system that your district uses. Then, in the classroom, you can focus on discussions, projects, hands-on experiences, and more.
Due to only being able to access the guest trial, I was only able to get a few screen shots. The presentation I created is no longer available due to the guest access.

This screen will be the first one that comes up when you get guest access. Before this screen, you will have to grant access to the camera and microphone on your computer. You will also have to make sure that you have the correct Flash installed. To add a slide, click the blue plus button. This will bring up the open file window. Find the document(s) that you want to use in your presentation and select them to open in Movenote.
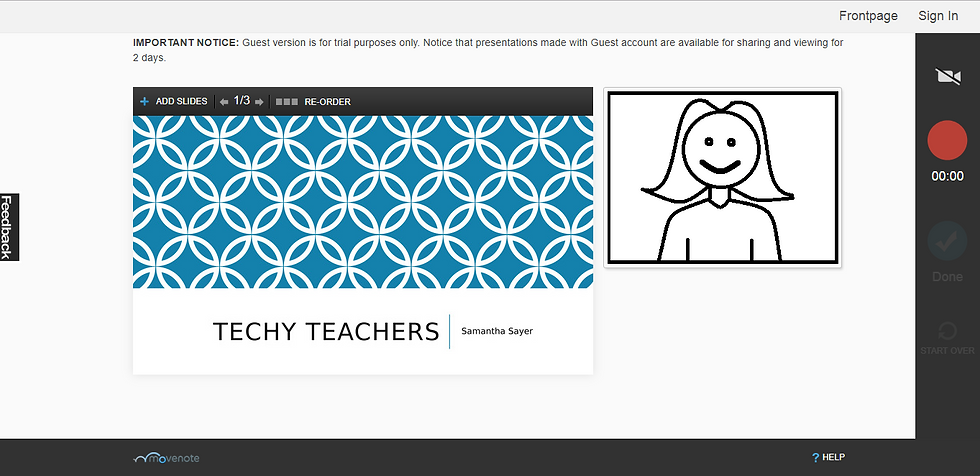
The next thing that you need to do is record yourself going through the presentation. Your face will appear on the right and you can change the slides on the left at the top by using the arrows.

If you need to reorder the slides to your presentation, click the Reorder button at the top by the arrows. This should be done BEFORE you record yourself explaining the presentation.

When you are finished, click the blue check button that says DONE. This will turn the format of your Movenote into a video that will automatically play the recording and change the slides. All you will have to do is push play.


Comments