
Hopscotch
- Sep 26, 2017
- 3 min read

Coding for kids made easy! Hopscotch is an app that allows students to start coding at an early age. They are able to create simple games, Minecraft models, simple websites, and much more! Coding is a new trend that students are flocking to everywhere. This app can get students excited about coding and technology. Hopscotch is free for a limited amount of features. For the paid version, you can pay $7.99 per month (on a month to month basis) or $6.67 per month (paid annually). This gives you access to ALL tutorials and more characters/features.
Negatives: The codes that are programmed in the app are confusing. They often do not make any sense in the context of games or projects. There are many tutorials that can help with this, but students would have to listen to all of these tutorials in order to figure out how to work the app. This is very time consuming for the classroom setting. If you assign it as homework, the students will probably catch on pretty quickly.
Lesson Ideas: This app would be best used in conjunction to a project. I suggest putting this as an option in a choice board project, as long as students have previously learned many of the options you have in the app. I could see this being used in math, science, social studies, and reading for a choice board activity. There are not many options that can be applied to all of these subject areas, but you are able to upload images from your phone so there are many possibilities.
Since this app is only used on a smart device or tablet, here are the screenshots that you should learn about before using the app.

This is the first screen that will appear after you sign up for an account with Hopscotch. You can decide what you would rather do first on this screen. You can start creating your own projects or you can explore games and designs that other people have created to share with the Hopscotch community.
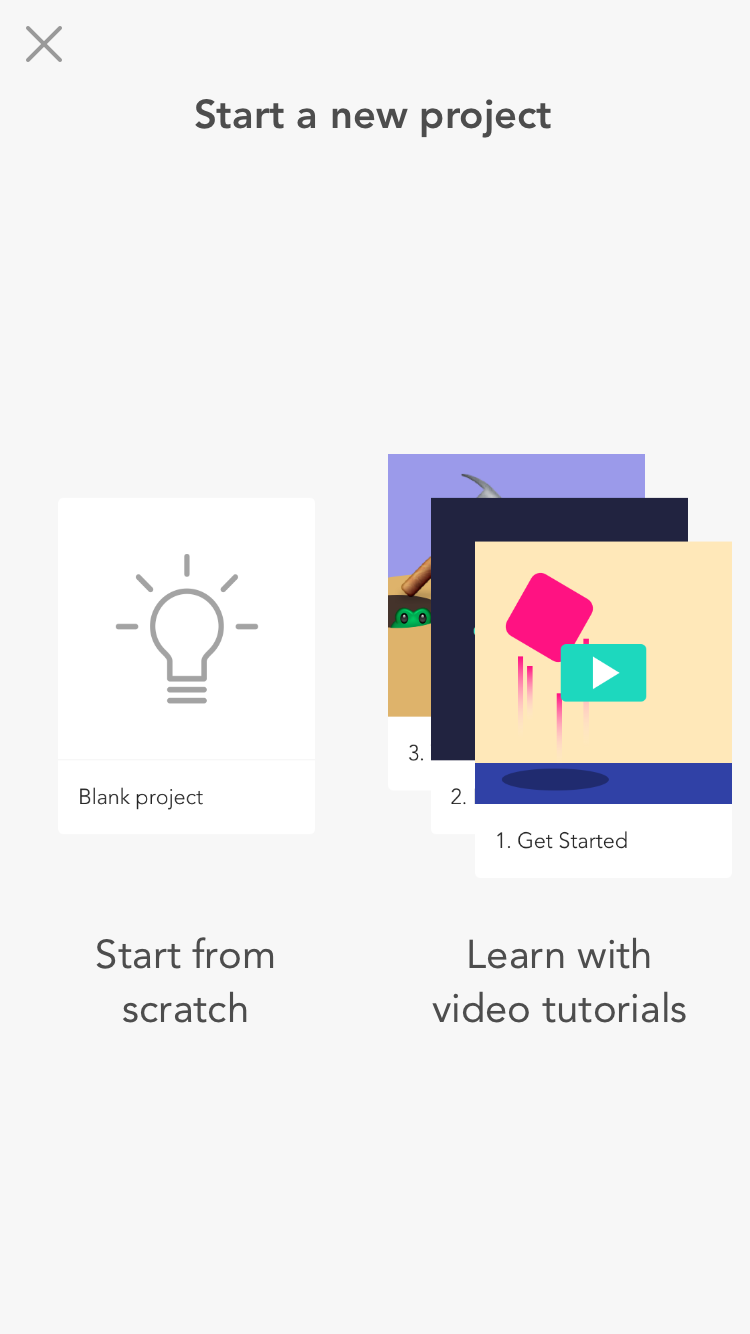
When you select that you want to start by creating a new project, this screen appears. From this screen, you can choose to start from scratch with a project, or you can start learning about the app with video tutorials. If you have your kids start working with this, I would have them start with the video tutorials. These tutorials walk you through simple to complex processes.

This is the screen that appears when you select that you want to play games of other Hopscotch users. There will be a list of games or videos that display and you have the option to try out. Simply click on the game that you want to play.
Below I have included multiple galleries for the different options that you have when you are creating your own game. The first group of pictures are the first stages of creating your own project. These are different items that you can add to your screen.


The second group of pictures in the following gallery show what you can do with each item that you add to the screen. When you add an item to the screen, there will be a bubble that appears to add code to the item. This will tell what the item will do when an action from the user occurs.


Finally, if you decide to learn through the tutorials, these are the screens that you will want to be aware of.


I encourage you to get your students excited about coding by creating their own games using Hopscotch!


Comments